

Spring hello world…!!!
Step 1:
Create a dynamic web project named “JavadomainSpringMVC”.
Step 2: Download and add the below mentioned spring jar files to lib folder which is in WebContent/WEB-INF/lib.
Required Spring jar files:
1. commons-logging-1.0.4
2. jstl-1.2
3. org.springframework.asm-3.1.0.RELEASE
4. org.springframework.beans-3.1.0.RELEASE
5. org.springframework.context-3.1.0.RELEASE
6. org.springframework.core-3.1.0.RELEASE
7. org.springframework.expression-3.1.0.RELEASE
8. org.springframework.web.servlet-3.1.0.RELEASE
9. org.springframework.web-3.1.0.RELEASE
10. spring-web-3.2.1.RELEASE
Step 2:
Create a package named “in.javadomain.spring.controller” under src.

Step 3:
Create a java class (here controller) named “BlogAuthorController” and paste the below code,
[java]
package in.javadomain.spring.controller;
import org.springframework.stereotype.Controller;
import org.springframework.web.bind.annotation.RequestMapping;
import org.springframework.web.servlet.ModelAndView;
@Controller
public class BlogAuthorController {
@RequestMapping("/javadomain")
public ModelAndView Blog() {
String message = "Javadomain.in provides lot of programming solutions and tutorials";
return new ModelAndView("javadomain", "blogInformation",message);</pre>
<pre>}
@RequestMapping("/author")
public ModelAndView Author() {
String message = "I am Naveen author of Javadomain.in";
return new ModelAndView("author", "authorInformation",message);</pre>
<pre>}
}
[/java]
Step 4:
Create a web.xml (deployment descriptor) under WebContent/WEB-INF folder and paste the below code
[xml]
<?xml version="1.0" encoding="UTF-8"?>
<web-app xmlns:xsi="http://www.w3.org/2001/XMLSchema-instance" xmlns="http://java.sun.com/xml/ns/javaee" xmlns:web="http://java.sun.com/xml/ns/javaee/web-app_2_5.xsd" xsi:schemaLocation="http://java.sun.com/xml/ns/javaee http://java.sun.com/xml/ns/javaee/web-app_2_5.xsd" id="WebApp_ID" version="2.5">
<display-name>Javadomain-Spring</display-name>
<welcome-file-list>
<welcome-file>index.jsp</welcome-file>
</welcome-file-list>
<servlet>
<servlet-name>JavadomainSpring</servlet-name>
<servlet-class>
org.springframework.web.servlet.DispatcherServlet
</servlet-class>
<load-on-startup>1</load-on-startup>
</servlet>
<servlet-mapping>
<servlet-name>JavadomainSpring</servlet-name>
<url-pattern>*.html</url-pattern>
</servlet-mapping>
</web-app>
[/xml]
Step 5: Create a file named “JavadomainSpring-servlet.xml” (Dispatcher servlet) and copy the below code,
[xml]
<?xml version="1.0" encoding="UTF-8"?>
<beans xmlns="http://www.springframework.org/schema/beans"
xmlns:xsi="http://www.w3.org/2001/XMLSchema-instance"
xmlns:p="http://www.springframework.org/schema/p"
xmlns:context="http://www.springframework.org/schema/context"
xsi:schemaLocation="http://www.springframework.org/schema/beans
http://www.springframework.org/schema/beans/spring-beans-3.0.xsd
http://www.springframework.org/schema/context
http://www.springframework.org/schema/context/spring-context-3.0.xsd">
<context:component-scan
base-package="in.javadomain.spring.controller" />
<bean id="viewResolver"
class="org.springframework.web.servlet.view.UrlBasedViewResolver">
<property name="viewClass"
value="org.springframework.web.servlet.view.JstlView" />
<property name="prefix" value="/jsp/" />
<property name="suffix" value=".jsp" />
</bean>
</beans>
[/xml]
Step 6: Create a file named “index.jsp” and copy the below code,
[html]
<html>
<head>
<title>ngdeveloper.com</title>
</head>
<body>
<a href="javadomain.html">About Javadomain</a> <br><br>
<a href="author.html">About Author</a>
</body>
</html>
[/html]
Step 7: Create a folder named “jsp” under WebContent and create a “javadomain.jsp” and “author.jsp” under “jsp” folder that we have created as like below,

Step 8: Copy the below code to “author.jsp” file,
[html]
<html>
<head>
<title>Javadomain.in</title>
</head>
<body>
${authorInformation}
</body>
</html>
[/html]
and copy the below code to “javadomain.jsp” file,
[html]
<html>
<head>
<title>ngdeveloper.com</title>
</head>
<body>
${blogInformation}
</body>
</html>
[/html]
Step 9: Project structure looks like this,

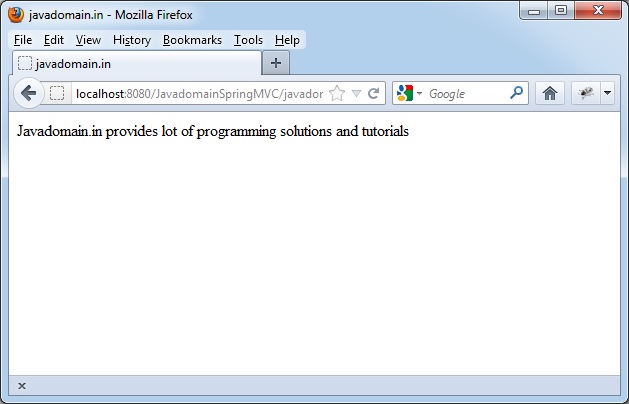
Step 10: Now run the “index.jsp” file and click the link to see the outputs as like below,


Download the Project:
Spring MVC Hello World Package
Download the Spring MVC Hello world Package for Spring version 4:
Spring 4 MVC Hello World Package with all the required Jars
Flow:
1. Once the url entered, the request will go to deployment descriptor (web.xml).
2. From the web.xml the request will be moved to dispatcher servlet (app-string.xml) file.
3. From the dispatcher servlet request will be moved to controller.
4. Controller will return the object to the view.
5. View will display the response for the request.